paisley shabby chic

Saturday, December 29, 2012

Gingerbread House 2012 Christmas

I love Christmas, and I always enjoy making a Gingebread house too. My favourite feature is the roof, which I cover in m&m's or Smarties. It's become a bit of a tradition to take one to my family's Christmas get together on Boxing Day.
This is 2011's...
2011 Gingerbread House
2011
Last year my brother challenged me to create either a double storey or a house with rooms for 2012. So I decided to do the double storey. I found a template at graphicality but knew that I couldn't fit both wings on if I wanted to transport it two hours to the country, so I only did one.

My friend Johnny is very creative and also makes gingerbread houses. He was my competition this year. Even if his house was crap it'd still look better because he has the skillz with the cameraz. But it was amazing. This was his creation:


Another friend, Emily, was making her first gingerbread house this year, based on this hilarious version. We're yet to see her interpretation though.
Crack (Gingerbread) House
For the first time ever (or maybe since Year 12) I was working right up until the 21st of December, which meant that I was so disorganised for Christmas when I am usually super organised. I put my tree up at the end of October, and then from then on it was bedlam until Boxing Day. I made royal icing iced gingebread and gluten free shortbread for the staff morning tea on Friday 21st at school. I was making dough for these cookies before school between waking up and leaving I was that short on time. So I left the gingerbread house very late.
Here's a few filtered photos of my gingerbread making:


I am yet to perfect dying food. It appears to just dye my hands instead...
(background is the outline of my shortbread snowflake cookies drying)  

Now to my 2012 gingerbread house. I made the dough on Saturday night (22nd), got up at 6.30am on Sunday and spent 3 hours in the kitchen rolling and cutting the dough (using my templates) until about 10.30. By then it was already 30 degrees and my apartment (which has no aircon) was like a sauna, so I stopped.
Creative shot of the sugar, butter and honey
gingerbread cooling


I had to wait until the Monday 24th to start decorating because it was too hot to be playing with chocolate, and hoping sugar would dry quickly and hard. Saturday arvo I had been supermarket shopping for some pure icing sugar. I had most of my chocolates already. But my local supermarket was sold out of pure icing sugar and I had a minor freak out. Sunday I drove to another supermarket and found some. Whew.

I had a lot of trouble this year deciding how to decorate my house. I'd seen so many different ways on Pinterest. I'd love to do a pastel one, but our Christmas was mainly red and green this year, with a touch of pink for the little girls. So I had to stick mainly with those colours.
I ended up doing and m&m and Smartie roof, same for bricks on the 3 storey part. These were brown but they look a bit halloweeny. Wasn't too pleased with it. Then mosaic freckles for the sides. I normally do a bullet fence, but I stole my friend Chris's mum's idea of using a curly wurly for the fence. It was super cute. It was the only part that got a bit melty and wrecked in the car ride to Heathcote. But normally the fence gets a bit wrecked anyway as it's around the edge.

the green light was just a glow stick for fun


little table and chairs and presents under the tree


Still hoping to get a photo from Emily of the crack house, but until then, this is my gingerbread house. I was pretty happy with it in the end. Although I hated the tree. Next year I think I'm just going to go back to the normal house, and put some rooms inside it. (Unless I'm in Paris!)


Wednesday, August 8, 2012

My First Glass Etchings

I've always liked the idea of writing a blog, but I thought "I don't have anything to write about that people will want to read" or "There isn't just ONE thing I could focus on". Then recently when doing some crafty stuff I thought "Who cares?? If I find the stuff I do fun and interesting someone else might too". 
Of course with the joys of Pinterest I figure someone will see something they like.
So here I am. 
Hello. I'm Georgie. Welcome to my blog. Today I am going to show you some glass etching I have done.

Etched Pie Dish
Being a bit of a Pinterest addict there is no way I could have missed all the etched glass tutorials. The minute I saw it I knew I wanted to give it a go. I did a bit of research and had a lot of trouble finding everything I needed in Australia.

I used this tutorial from Make it and Love it:
http://www.makeit-loveit.com/2010/06/glass-etching.html
The dreaded Armour Etch

The first problem I encountered was that no where stocked Armour Etch. I tried craft shops, hardware stores, and even the internet. Nowhere in Australia. (If anyone knows of anywhere in Aus, PLEASE tell me!). I ended up ordering it online somewhere, so I had to wait a week or so for it.

Next problem was that I don't own a craft cutter machine of any sort, and I also don't know where to find vinyl. Australia's a great place to live, but the internet only shows me how little access we have to things. Half the recipes I find from the States use ingredients that just wouldn't exist here or I've never heard of, and lots of the craft tutorials list brand names and I don't know what the equivalent product is. So custom cut vinyl was out. I decided to give stickers a go, and try using a craft knife to cut contact. But by absolute chance I came across some self adhesive stencils in Arthur Daley's (Swanston St, Melbourne) and bought the whole range cos I knew I would use them and they were only $2 a sheet.

Now I had the stencils and Armour Etch on the way, I just needed to find my pie dish. Another problem. HOW COULD SUCH AN EASY TUTORIAL BE SO HARD?? Almost every dish I found was Pyrex, which they specify cannot be etched. Eventually I found the perfect sized and shaped one at Kmart. I got home and read the info on it, just out of curiosity and it said it cannot be used above 120 degrees Celsius. WHAT?? I don't think I've ever cooked anything at such a low temperature. Most pie's need at least 180 and up to 220! So i returned it. I found the exact same looking one with a different label at a $2 type shop (cost me $5.50) and it didn't say anything about temperature, so I bought it. I made sure I tested it in the oven before I etched it though.

When my etching cream arrived, I was ready!
I masked off the areas I wanted to keep clean, stuck on the stencil, put on my gloves (apparently the cream "may be fatal") and got to work.

 
My pie dish with its stencil, covered in Armour Etch
I repeated this process for the next two doilies on the stencil. The biggest one you can see on the right above was quite tricky when it came to peeling it off and I ripped it, but the result was still fine.
Almost finished product
I did the three doilies* then decided that I need to find a fourth whole doyley* design to go in that last gap. I actually made this over a month ago and it is still unfinished as I am yet to find my doyley. It's tricky because I need it to be adhesive. I was thinking of using a fabric one, but I'm not sure how to do that quite yet. Otherwise I love it!

*This word annoys me a lot. I dont like the look of doyleys as a plural, nor do I think doilie/doiley looks right for singular!

CD's Pi Dish
A favourite friend of mine is a high school Maths teacher. A lovable nerd. He celebrates Pi Day on the 22nd of July and the 14th of March. I laugh. But secretly I love it, and I love the excuse to make him a present. Last year I made him a card which I stamped a heap of decimals of Pi onto. It took a while. This year since I was on a roll with the glass etching I decided to make him a Pi themed pie dish.

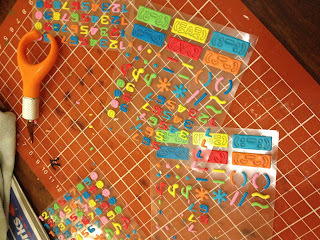
The stickers I used to make Pi around the edges of the dish
More than half way through sticking on the numbers. This was the hardest part because I'm mildly dyslexic I really had to concentrate to make sure the numbers were in order, because I knew my friend would know if they were wrong.
In the centre using contact I cut out a stencil in the shape of Pi. It was a bit tricky to put on the dish, but worked out well. The etching's a bit blotchy, but on the bottle it says it doesn't work on large areas.
On the side I wrote the symbol =, and then ended it with <3 g.

The last photo shows how I brought the letters under as I got back to the start of each line.
As you can see here my '=' became a '-' and my 'g' is missing a bit too. I googled if there was a way to fix it and discovered that a little bit of clear nail polish managed to fix it, and it appeared to be exactly the same after it had been put in the oven too. So that was good to discover.
I even managed to learn about 25 decimals of Pi to impress my friend while I was making this.
I forgot to take a photo, but I gave it to him with an apple pie baked inside it, and once we'd eaten some of it I told him what it was.

Hope you enjoyed my first ever blog.